About two weeks ago, the latest Ballard Designs catalog arrived at our door. It didn't take me long to zero in on a woven garden seat that was versatile enough to double as a side table for our living room or den...but I balked at the cost: $160/seat! I needed two, and $320 for small pieces felt like an extravagance.
With some brainstorming, I came up with a much less expensive solution that a) met the need for an accent table and b) mimicked the look of woven rope. Let's me show you how I DIY'd it.
Before I proceed explaining my steps, it's worth noting that these tables probably aren't the best choice for a house with cats. They'd quickly become the ultimate cat scratching pole and that would be a shame!That said, here's what was needed for the pair of rope side tables I constructed:
For this project, I purchased 1 4'-long concrete forming tube from Lowe's for $13 and 8 packages of 50' 3/8" wide manila rope for $9/each (in addition to the other supplies I had already). So, that's $85 out of pocket for two tables...not penny-pinching cheap, but not ridiculously priced either.
I began creating the tables by cutting the tube with a utility knife so that I was left with 2 20"-long tubes. This would be the height of each table once finished.
I laid out 2 foam core boards and traced/cut 2 circles out of each board using a utility knife to serve as a top and bottom of each table.
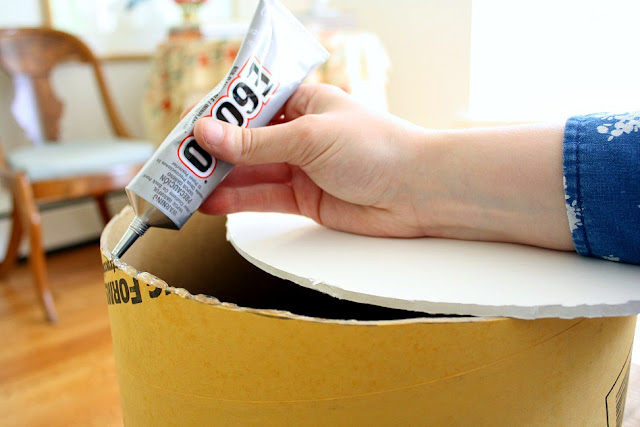
With the circles cut, I applied E6000 glue to the rim of each tube at both ends and attached the foam core circles. Then, I waited for the glue to set before moving on. A glue gun could also be used to attach the bases and tops to the tube too if E6000 glue isn't available.
Once the tops and bottoms of both tables were adhered I glued the rope around the bottom edge of the first table using a glue gun, wrapping the rope tautly. I applied glue every few inches as I moved around the outside of the table. Using a glue gun is probably best for this step since the rope is adhered strongly as soon as the glue cools.
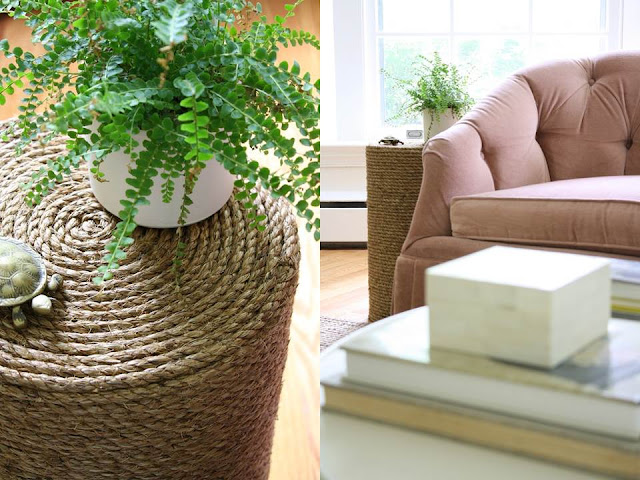
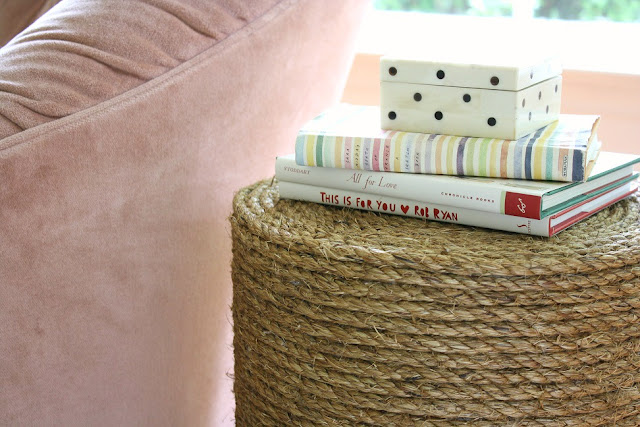
Once I arrived to the top of the table, I continued coiling the rope around the top from outside towards the center of the tabletop until it was fully covered. There were some seams on the side of the table, which is where one piece of rope ended and the next started. Sure, it would have been great to have one continuous piece of rope, but the seams aren't conspicuous at all.
Then, I repeated the same process for the second table.
These tables took several hours to complete, but I did stop several times throughout the afternoon I worked on them. Once I saw the results, I knew that it was time well spent.
(all via Meet Me in Philadelphia)
All told this project cost me a full afternoon of cutting and gluing and about $85 in total, which is still a lot less than purchasing two rope-style tables from, say, Ballard Designs or any other shop currently offering a similar look.
Ultimately, I think these tables will be heading into the den where they should pair nicely with the dark navy walls; but for now, they'll hold a nice drink or two in the living room. They can even serve as extra seating in a pinch!
Now, I ask you: what's not to love?
Ultimately, I think these tables will be heading into the den where they should pair nicely with the dark navy walls; but for now, they'll hold a nice drink or two in the living room. They can even serve as extra seating in a pinch!
Now, I ask you: what's not to love?


These look awesome!! Great project!
ReplyDeleteThese are AMAZING Ashley!
ReplyDeleteThis is pure genius!
ReplyDeletecute!!! Love it.
ReplyDeleteThat is a seriously awesome DIY.
ReplyDeleteSo clever, we love ingenuity and you are great!
ReplyDeleteIs there anything you can't do? They're fantastic!!!
ReplyDeleteLOVE the texture! Love the portability. Yup, this is a great project!
ReplyDeletevery cute! Thanks for sharing this and inspiring me!
ReplyDeletexo Nancy
Powellbrowerhome.com
ok, I'm inspired. I want to wrap everything in twine now!
ReplyDeleteso cute!! Make me one!
ReplyDeleteThese look so great! Nice work. Also...the mauve color of couch is growing on me. Haha. I know it will look awesome when you decide to recover it, too, though.
ReplyDeleteLove this project!! They look so so great next to your sofa!!
ReplyDeleteSuch a smart idea, and the end result looks really well done. Now what other little tables can we DIY? They are so flexible and fun but tend to cost way too much at retail!
ReplyDeleteLove these! And what is especially wonderful is that they look so finished...I wouldn't suspect DIY. I can already picture them in that moody blue den of yours!
ReplyDeleteI love this idea. unfortunately, my cat would too!
ReplyDeleteWhat a great idea! I love the way they turned out.
ReplyDeletethis is fantastic! They look so great and I love your sofa!
ReplyDeleteI love your end table. I'm doing a roundup of my favorite rope projects and would love to include this on my blog. Let me know if you have any concerns. I will be providing links to all of the projects.
ReplyDelete